Are you someone who likes camping? I’m definitely not. But I know lots of folks dig it (for some reason), and portable foods to bring along are a must. These fall into that category: an easy-to-take-with-you, allergen-friendly recipe that kids’ll love for those times when they’re attending camp during these (finally) warmer months!
For National Allergen Month, I’m celebrating again with So Delicious Dairy Free to create a top 8 allergen-free, vegan recipe that everyone will love whether they’re away on the campgrounds or not. These fit the bill: they have a double dose of chocolate, are studded with dried cherries, and have an underlying creaminess from the Culinary Coconut Milk. They’re inspired by black forest cake (my favourite), which, of course, definite coincides with the great outdoors. (Get it? Forest?)
You can see my last celebration with So Delicious here, with my Banana-Tahini Caramel-Chocolate Pudding Pie.
One more thing: So Delicious Dairy Free has a cool campaign going on until May 12th called the #140Difference – The World’s Shortest Grant Application. They’re seeking people toTweet/Facebook/Instagram them their ideas for projects that protect the earth and animals, as well as ideas/programs that support those with food allergies or plant based eaters. The best part? They’re giving away $30,000 over 3 weeks, granting awards daily. You can check out more here.
Biscotti are one of my favourite things to make–second only to cake–and these are among my top picks (hello, chocolate). They’re freezer-friendly, too, if you want to double the batch, but I can tell you they probably won’t last very long.
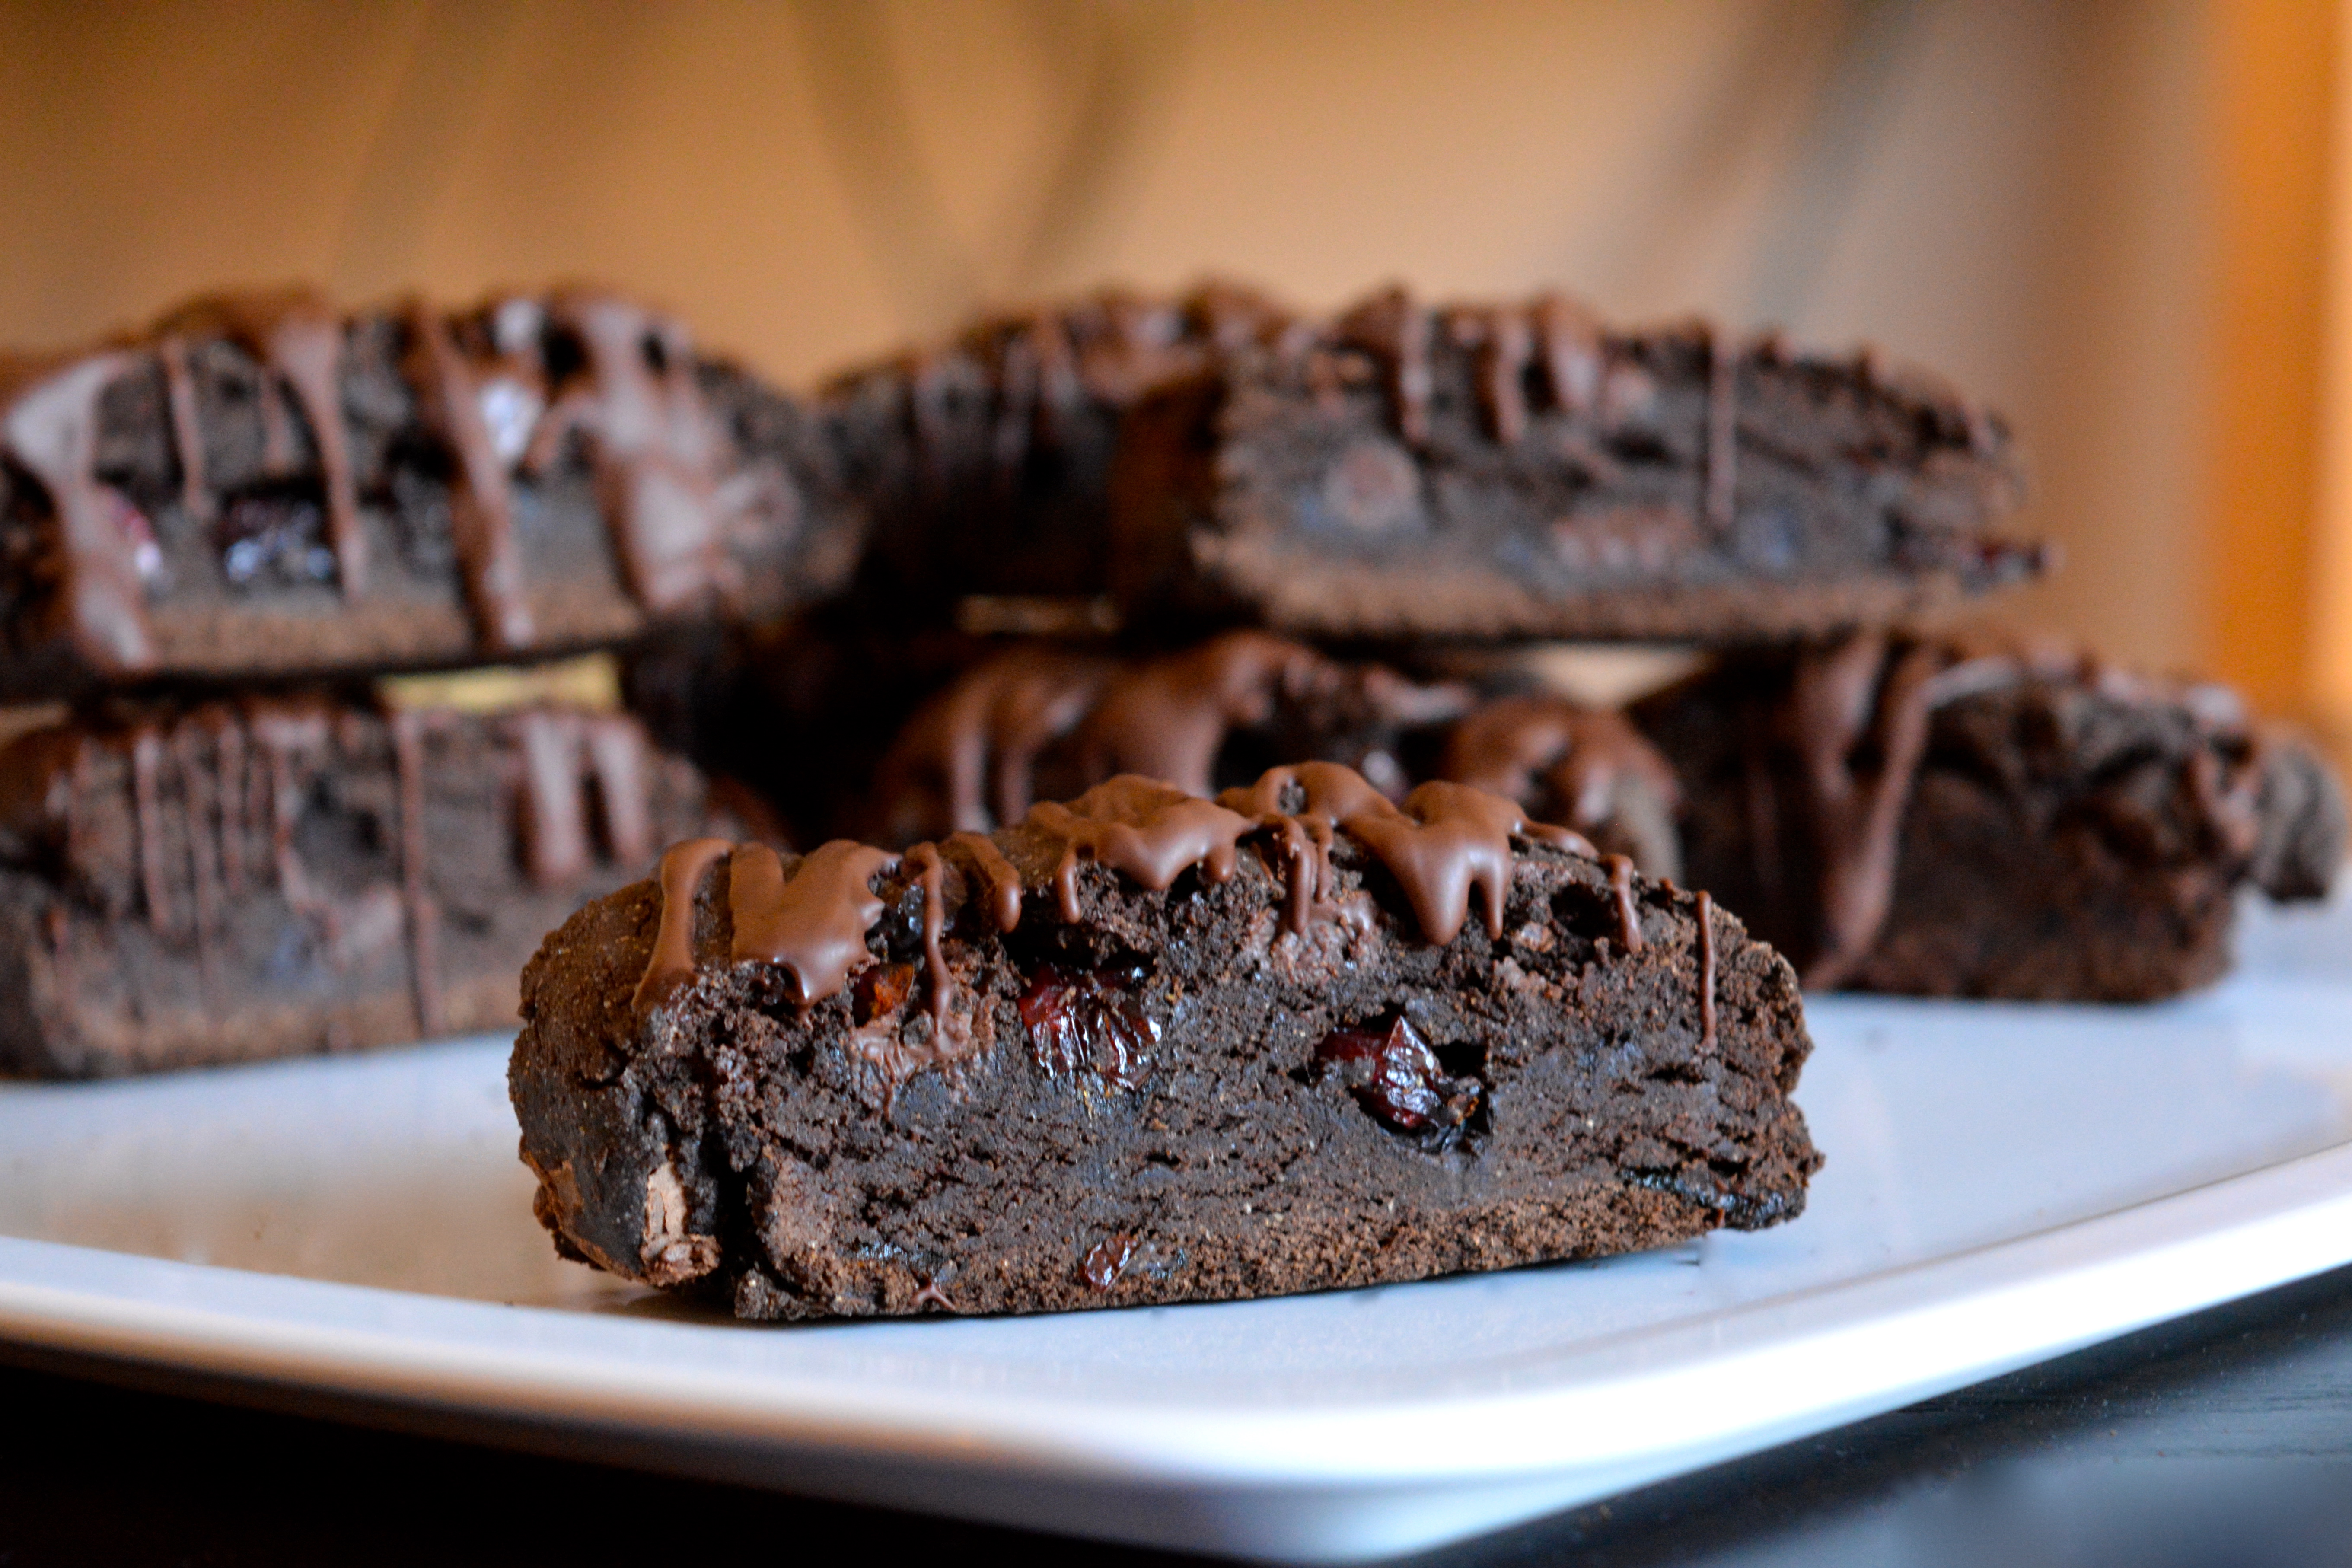
Black Forest Biscotti
1 cup sorghum flour
1/2 cup teff flour
1/3 cup tapioca flour
1/3 unsweetened cocoa powder, preferably dark
1 teaspoon baking soda
1 teaspoon xanthan gum
1/4 teaspoon salt
2/3 cup packed brown sugar
1/2 cup So Delicious Original Culinary Coconut Milk, plus more as needed (about 2 tablespoons)
2 teaspoons vanilla extract
1/3 cup nondairy chocolate chunks
1/3 cup dried cherries (tart or sweet)
1/3 cup nondairy mini chocolate chips
2 teaspoons coconut oil
Preheat the oven to 325 degrees F. Line a baking sheet with parchment paper.
Put the sorghum flour, teff flour, tapioca flour, baking soda, xanthan gum, and salt in a medium bowl. Whisk well to combine.
Put the brown sugar, 1/2 cup of the culinary coconut milk, and the vanilla extract in large bowl or the bowl of a stand mixer. Using a handmixer or the stand mixer, beat until well combined. Add the flour mixture. Beat until the mixture begins to stick together (it might take a couple minutes), adding up to 2 tablespoons additional culinary coconut milk, as needed. Turn off the mixture and use your hands to mix in the dried cherries and chocolate chunks. The mixture will be stiff.
Transfer the mixture to the baking sheet. Divide it in half, and form each half into a log, about 3 inches wide, 8 inches long, and 1 inch high. Bake for about 30 minutes, until the top is firm to the touch. Let cool 10 minutes. Using a sharp knife, cut the logs into 1-inch slices.
Lower the temperature of the oven to 300 degrees F. Put each slice on the baking sheet, cut-side down. Bake for 15 minutes. Turn the slice over so the other cut side is on the baking sheet. Bake for 10 to 15 minutes, until firm to the touch. The biscotti will continue to harden as it cools. Transfer to a wire rack to cool completely.
Once the biscotti is cool, put the nondairy chocolate chips and coconut oil in a small bowl. Microwave on 30 second intervals, stirring in between each one, until the chocolate has melted. Use a fork to drizzle the mixture over the top of the cooled biscotti. Cool completely before serving or storing.
(Disclosure statement: I received monetary compensation and free product coupons from So Delicious Dairy-Free for taking part in this campaign. I only, however, promote and partner with companies I love and use regularly in my own kitchen. As always, all opinions and recommendations expressed are completely my own.)